
Introduction
This tutorial is intended to demonstrate the process of configuring Inveo BoxID/Clocker RFID readers with Mitsubishi FX and Q series PLCs . In this article we will show the process of configuring the devices first in GX Works2 then in GX Works3. Our readers are also compatible with iQR series controllers, and the configuration process looks identical to the FX series.
Configuring the controller in GX Works 2
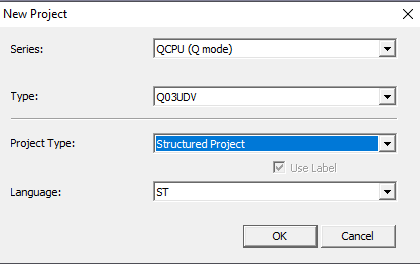
We will use the MC protocol to integrate devices in GX Works2. We start by creating a new project, the next important step is to select the CPU, project type and language. In my case, it will be Q03UDV, Structured Project and ST.
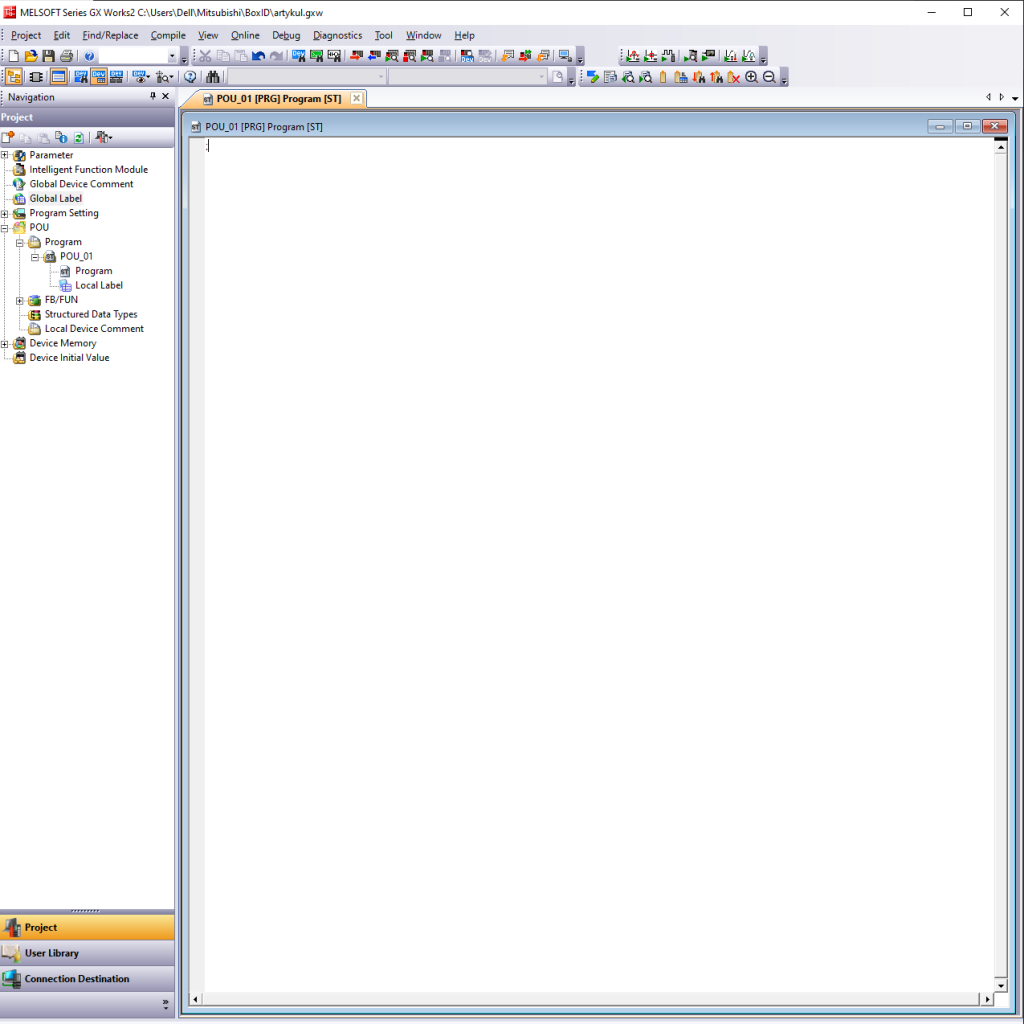
If you have configured the project correctly, the project tree should appear on the left side of the screen. The next step will be to configure the network settings of the controller.
We need to make sure that both the PLC and the reader are on the same network.
In my case, it will look like this:
- Mitsubishi Q03UDVCPU – 192.168.21.137
- Inveo BoxID – 192.168.21. 199
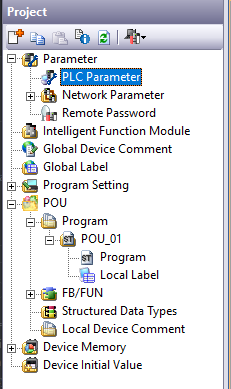
To configure the network settings of the controller in GX Works2, expand the “Parameter” folder and then double click on “PLC Parameter”.
After double-clicking on “PLC Parameter”, the “Q Parameter Setting” window should appear, after opening the window, enter the “Built-in Ethernet Port Setting” tab.
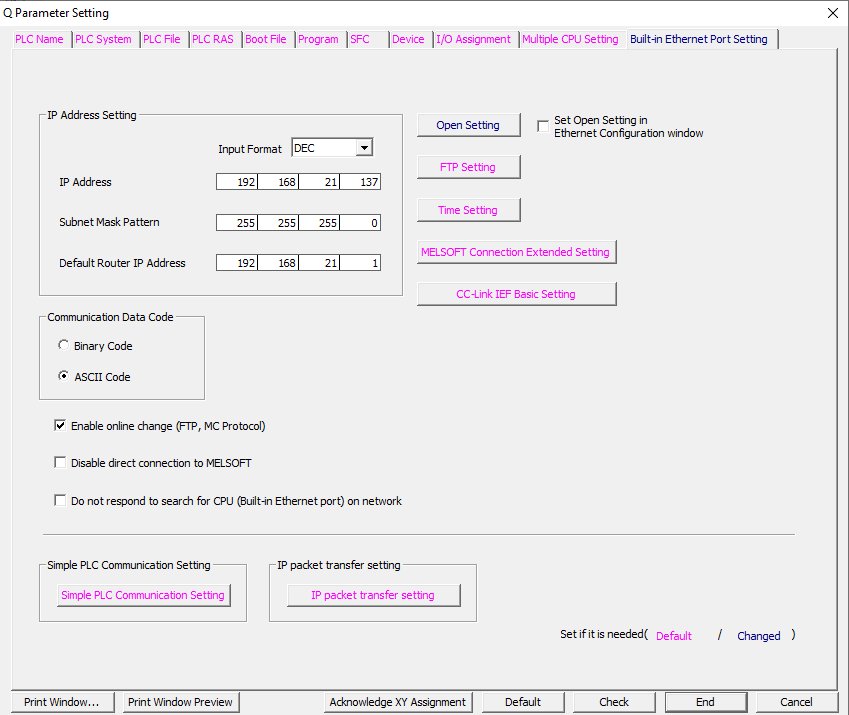
Configure the settings accordingly, “IP Address Setting” is the network configuration of our controller. We set the “Communication Data Code” parameter to “ASCII” and activate data exchange with external devices via MC Protocol “Enable online change”.
Then we press the “Open Setting” button and select the port we will use – in my case 1280.

Configuring the controller in GX Works 3
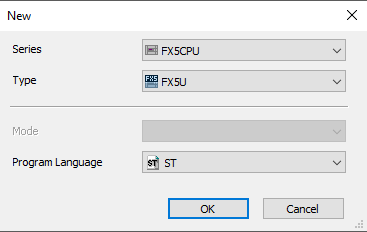
We will use the SLMP protocol to integrate devices in GX Works3. We start by creating a new project, the first important step is to select the CPU and language. In my case, it will be FX5U and ST.
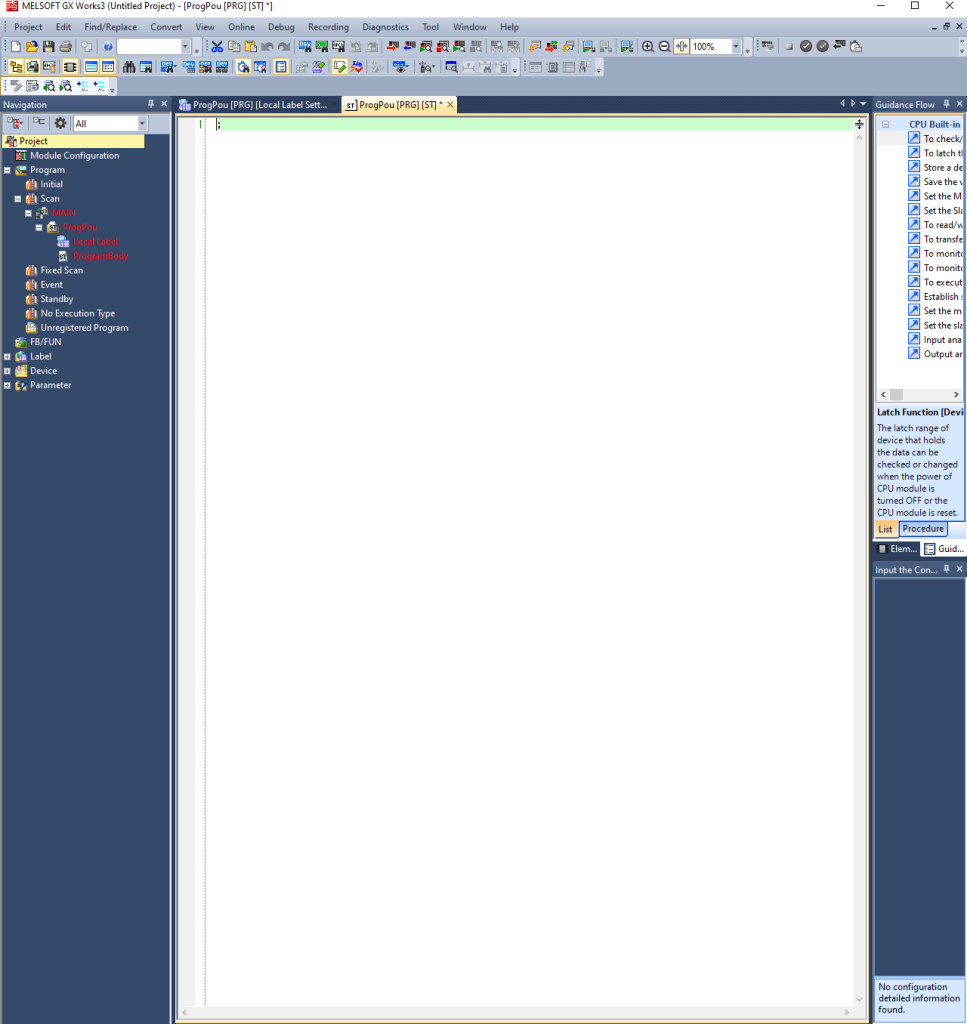
If you have configured the project correctly, the project tree should appear on the left side of the screen. The next step will be to configure the network settings of the controller.
We need to make sure that both the PLC and the reader are on the same network.
In my case, it will look like this:
- Mitsubishi FX5U – 192.168.21.137
- Inveo BoxID – 192.168.21. 199
To configure the network settings of the controller in GX Works3, expand the “Parameter” folder, then “FX5UCPU” and after expanding “Module Parameter”, press “Etheret Port” twice.

After double-clicking on “Ethernet Port,” the “Module Parameter Ethernet Port” window should appear, where we will configure the network settings.

You need to configure the settings accordingly, “Own Node Settings” is the network configuration of our controller. We set the “Communication Data Code” parameter to “ASCII” and activate data exchange with external devices by pressing “” twice in the “External Device Configuration” line. To activate data exchange, drag the “SLMP Connection Module” from the “Ethernet Device” tab to our “Host Station.” Also remember to set the appropriate port, in my case 1280.
Configuring the BoxID/Clocker reader
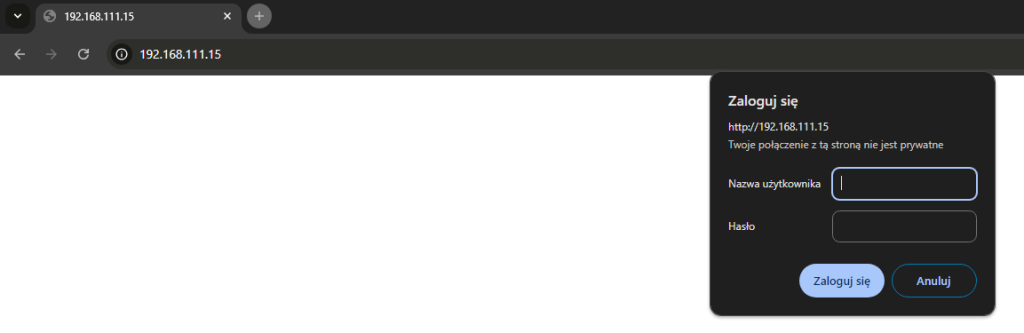
Now it’s time to configure the reader. The operation of this reader is done entirely through the built-in web server. When you connect to the reader for the first time, you should enter its default IP in your browser: 192.168.111.15. During this operation, make sure that our network card is on the same network as the reader.
After connecting to the reader we will be asked for login and password, the default login credentials are:
login – admin
password – admin
It is recommended to change the login and password so that unauthorized people do not have access to change the configuration of the device.
If we use our Discoverer application, our network card may be on a different subnet.
After correctly logging in to the reader’s website, we should see such a panel:

Następnym krokiem jest ustawienie odpowiedniego adresu IP dla czytnika, tak aby znajdował się on w tej the same network as the PLC, as we remember at the beginning we determined that our application would be configured as follows:
Mitsubishi FX5U – 192.168.21.137
Inveo BoxID – 192.168.21. 199
In order to get this effect, we need to go to the “Administration” tab, then to “Network” and change the “DHCP” parameter to “Disable” and set the IP address to the one our application requires – in this case it will be 192.168.0.199.

After pressing the “Save” button, the changes will be saved and the reader will already restart with the newly assigned IP address. Further possible configuration of the reader via the web server from now on will be possible only after changing the network card settings of the computer you are using to the appropriate IP address.
Addressing
We have come to the point where the RFID reader and the PLC are on the same network, but cannot yet exchange any data between them.
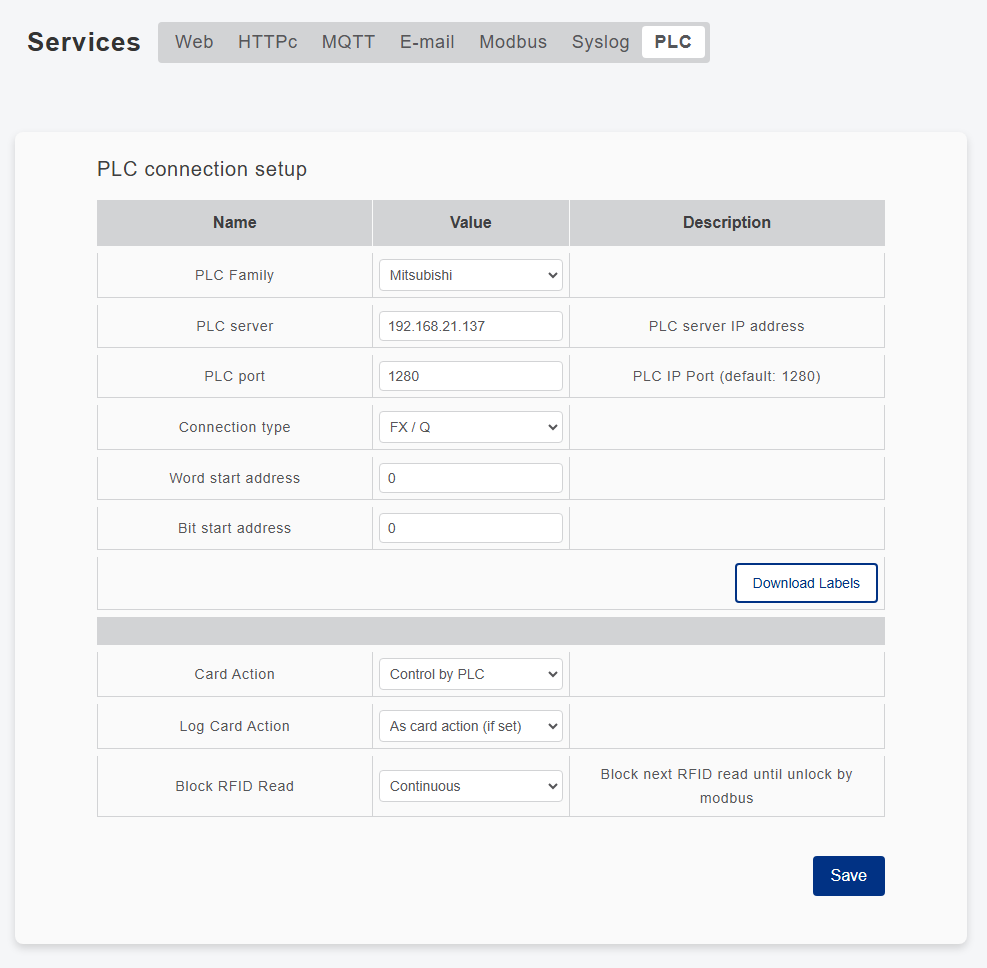
Now we can enable them to do so by going to the “Services” tab, then “PLC”. In the above tab, select the PLC family, in our case “Mitsubishi”, next we set the appropriate port and type of PLC, also remember the starting addresses.
Initial addresses two memory areas storing variables of type “word” and “bit”, GX Works designated as “Device” “W” and ”B.” These addresses determine what will be the starting address of the global variables table, this address will be needed to generate a “.csv” file with “Global label” variables.
After entering the parameters, we press the “Download Labels” button.
After downloading the .zip file, unzip it and import the .csv files from the Global Label directory into the GX Works2 or GX Works3 environment depending on our CPU. In both cases, right click on Global Label, press Import File and select the .csv files.

Communication test
To check whether the configuration has been successfully completed, check whether the value of the variable named “I_liveBit” from the “control” block changes its state. Cyclic switching of the state of the value of this variable symbolizes the correct establishment of communication between devices.